
Connect
The Connect page manages the live bridge between DEJA Cloud and your hardware. When your DEJA Server is running and a device is registered, you can connect, disconnect, and monitor the link from here.

How Connection Works
DEJA Cloud talks to your layout through your DEJA Server, which bridges the cloud and your hardware over a USB serial connection. The Connect page lets you pick which device to talk to and verify the connection is healthy.
Connecting Your Server
The server band at the top of the connection hub shows whether your DEJA Server is online — and when it's offline, it shows the deja start command with a copy button plus install and troubleshooting links. To link a server to your layout:
- On the server machine, run
deja login. The CLI prints a short one-time code and opens DEJA Cloud in your browser. - The authorize page shows the code — check it matches your terminal, pick the layout to connect, and click Authorize. (You can deny the request if you don't recognize it.)
- The CLI finishes on its own, and the server stays signed in from then on — it renews its own credentials automatically.
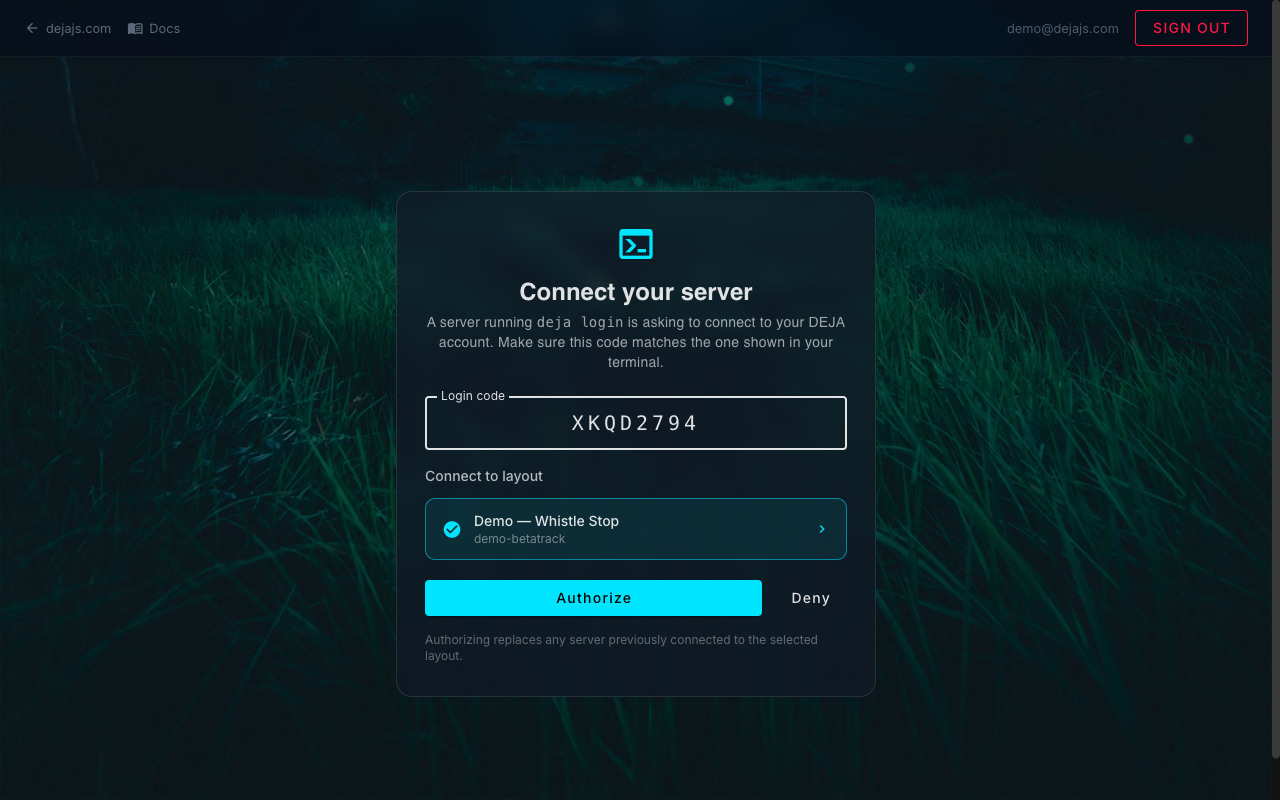
To move your server to a new machine, just run deja login on the new machine — authorizing it replaces the server currently connected to that layout, so the old machine stops syncing on its next restart.
My Layouts
Below the connection hub, the My Layouts section is your layout home base:
- List & switch — every layout you own or belong to, with role chips. Tap to switch the Cloud app to that layout.
- New Layout — create another layout (name it, and a unique layout ID is generated and checked for availability — the same validated flow as onboarding). New layouts start empty with a default DCC-EX EX-CommandStation device, ready for device setup.
- Join another layout — enter a layout ID or paste an invite link to join someone else's layout, or request access if it needs the owner's approval (see Access). Pending and declined requests show their status here.
Connecting a Device
From the dashboard or Connect page:
- Click a device's row in the table (or its Connect button — shown for USB and WLED devices when offline).
- In the side panel, choose the serial port (auto-detected from available USB ports) or WLED host address.
- Click Connect — the row's badge turns green when the link is verified. WiFi/MQTT devices skip all of this: they announce themselves and connect automatically.
Connection Status
Each device row shows an honest, evidence-based status:
- ● VERIFIED (green) -- The server has real proof the device is alive: an open serial port for USB devices, actual traffic for WiFi/MQTT.
- ◐ LINKED (amber) -- Linked, but the device hasn't spoken recently — awaiting its first message.
- ◌ WAITING (gray) -- The DEJA Server itself is offline, so no device can truly be connected.
- ○ OFFLINE (gray) -- Device is not reachable. Check the cable, power, and server status.
Troubleshooting
- No ports available -- Make sure your EX-CommandStation is plugged in via USB and the DEJA Server is running. Click Refresh Ports to re-scan.
- Connection drops -- Check USB cable quality. The server will auto-reconnect on brief interruptions.
- Multiple devices -- Each device connects independently. You can have a DCC-EX EX-CommandStation and IO boards connected simultaneously.
Related Pages
- Devices -- Register and configure hardware devices.
- Dashboard -- Quick-connect from the home screen.
- DCC-EX Console -- Send commands once connected.